Troubleshooting Windows Fax and Scan for Windows 11 or 10.

Starting Windows Fax and Scan in Windows 11 or 10.
Windows Fax and Scan can be started by typing wfs.exe from the search bar. To switch between Fax and Scan views, click View, Go To. If wfs.exe is not found, you will need to install Windows Fax and Scan.
Some Windows Fax & Scan features need Administrator privileges. If you’re having trouble, like can’t send a fax directly from the New Fax window, try starting wfs.exe with Administrator privileges.
- Press Windows Key + R, in the Run command line type wfs.exe
- Press and hold Control + Shift together, and Press Enter.
Installing or removing Windows Fax and Scan.
Choose to install or remove Windows Fax and Scan. Note that a reboot may be necessary after install or removal.
Windows 11 (To install or remove)
- Press Windows Key + I → System → Optional features.
- Click “View features” button.
- Type “fax”.
- Select Windows Fax and Scan from the list and click Next.
- Click Install or Remove.
NOTE: Click See Available Features to view the list of available features. Click See Added Features for the features already installed.
Windows 10 (To install or remove)
- Open Settings → System → Optional features.
- Click “Add a feature”
- Type “fax”.
- Select Windows Fax and Scan from the list.
- Click Install or Remove.
Manually resetting the Windows Fax and Scan Component.
If the Windows Fax and Scan option is not available as an optional feature, try these steps. First, manually remove the Fax and Scan component in Windows. Then, add the component again. This will clear any possible corruption.
- Open a Command Line in Administrator mode. Type
cmdinto the search bar. - Right-click on “cmd” in the search results and select “Run as administrator“
- type
Dism /Online /Remove-Capability /CapabilityName:Print.Fax.Scan~~~~0.0.1.0 - Reboot machine when completed. This will remove the Windows Fax and Scan option from your system.
- Open a Command Line in Administrator Mode. Type
cmdinto the search bar. - Right-click on “cmd” in the search results and select “Run as administrator“
- Type
Dism /Online /Add-Capability /CapabilityName:Print.Fax.Scan~~~~0.0.1.0 - Reboot machine when completed.
- Go to the Windows Optional Features to add the Windows Fax and Scan option.
Windows Fax and Scan is answering incoming calls.
Adjust the answering settings in Windows Fax and Scan
- Click View, Go to, Fax View. (You can skip this step if you are in Fax View)
- Click Tools, Fax Settings
- Uncheck the option “Allow the device to receive fax calls” or adjust the number or rings to answer/manual answer.
Windows Fax and Scan is not detecting my fax modem.
In late 2025 and January 2026, Microsoft disabled several types of fax modems in Windows 10 and 11. Some soft modems using a LSI/Lucent/Agere driver will no longer function in Windows due to a security flaw. This includes some Startech, U.S. Robotics and HIRO modems.
To send and receive faxes using an analog telephone line, you will need a fax modem. Fax Modems compatible with Windows 11 and Windows 10 are available from GetFaxing.com. If you use a VoIP telephone line, you will need to connect your fax modem to your analog telephone adapter (usually called an ATA)
Add a fax account in Windows Fax and Scan
- Click View, Go to, Fax View (You can skip this step if you are in Fax View)
- Click Tools, Fax Settings.
- The modem name should appear under Device Name. If not, click Select Fax Device.
- Choose desired Send/Receive options.
- Click OK.
- Click Tools, Fax Accounts.
- Click Add → Connect to a Fax Modem. Type in a fax modem name.
- Click Next.
NOTE: Sometimes you may need to remove the Fax Account and re-add it.
Windows Fax Service not starting.
Verify that the Windows Fax Service is not set to Disabled.
- In the search window, type services.msc and hit enter.
- Find the Fax service and double-click this entry.
- Change the startup type to Automatic or Manual.
- Click Apply, and OK.
Error: “The message cannot be sent. The media is write-protected.” when sending a fax.
- Start Windows Fax and Scan > Press Windows Key+R and in the run command line type wfs.exe and press enter.
- In Windows Fax & Scan, make sure you are in the Fax View. Click View, then select Go to. Enable Fax View.
- Click Tools, Fax Accounts.
- Select your local fax account and click Remove.
- Click Add and select the Connect to a fax modem option. Leave the default name or type “Fax Modem” and click Next.
- Choose one of the options on how to handle an incoming fax and then click Close.
- Click Tools, Fax Options to change your answering settings.
Error: “The message cannot be sent. An error has occurred.”
This is a generic error message. If you see this error message, try starting Window Fax and Scan with Administrator privileges.
- Press Windows Key + R, in the Run command line type
wfs.exe - Press and hold Control + Shift together, and Press Enter.
Fax number not being dialed correctly.
The fax number could be altered by the Windows dialing rules that are setup in Windows. Check the dialing rules to ensure that they are correct for your local area code.
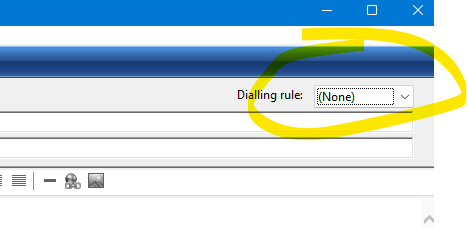
NOTE: You can also change the dialing rule to use “(None)” in the New Fax window. This option will not use any Windows dialing rules.
- Press the Windows key + R, type
telephon.cpl, and press Enter, or search for “Phone and Modem Options” in the Start Menu/Search bar.
More details available here:
https://www.getfaxing.com/2016/05/02/how-to-setup-dialing-rules-location-rules-or-tone-and-pulse-mode-in-faxtalk/
Preview fax shows printer dialog box.
The preview fax or New fax option shows a printer dialog box instead of printing directly to the Fax printer.
Run wfs.exe as an Administrator.
- Press Windows Key + R, in the Run command line type wfs.exe
- Press and hold Control + Shift together, and Press Enter.